Showing posts with label First Apartment Food. Show all posts

Too-Hot-To-Cook Veggie Pizza

>> Sunday, July 29, 2018

Too-Hot-To-Cook Veggie pizza


This recipe has been around for a while, but it's still an easy favorite for me and my daughter to make together. We first tasted this when a dear friend brought it to a potluck as an appetizer and shared the recipe all around. When Jessie moved into her first apartment and asked for recipes for her favorite foods, I bought her a cookbook and hand-wrote the recipes she loved best, including this one. We recently made this pizza together in her kitchen.

This is an easy dinner to make when it's too hot to cook, because it only requires a few minutes in the oven and then it cools in the fridge.

Cool Veggie Pizza

Ingredients

1 tube of crescent rolls
8 oz. cream cheese, softened
2/3 cup mayonnaise
1 package Hidden Valley Ranch seasoning
1 small onion, chopped
1/2 cup red pepper, chopped
1 cup broccoli, chopped
2 tomatoes, chopped
1/2 cucumber, chopped
1 cup mushrooms, sliced
1/2 cup black olives, sliced
(add any other chopped vegetables that you like)
2 cups shredded cheddar cheese

Directions

Unroll the cresecent roll dough and flatten into a greased 9x11 pan, pressing the dough up the sides of the pan and sealing the pre-cut seams between each roll. Bake the dough according to the package directions until golden brown. Allow to cool.

Mix together the cream cheese, mayo, and ranch seasoning. Spread on top of the crust in the pan.  Sprinkle with all the veggies and top with the shredded cheese. Refrigerate before serving.

Serves 4-6

Read more...

Skinny Chicken Piccata

>> Saturday, February 25, 2017


Skinny Chicken Piccata


The original recipe for this light chicken piccata came from LaaLoosh, a delicious and healthy food blog for people on Weight Watchers. She says one serving is 4 points + in the Weight Watchers system.

I made a few changes, like omitting the wine, since I was making this for our dinner but also taking dinner to a friend who is just recovering from serious surgery.

We don't mind eating lighter as long as it's this easy and tasty!

Ingredients

1 tbsp light butter
1 10oz package white mushrooms, sliced
2 large boneless, skinless chicken breasts
1/4 cup flour
1 tsp paprika
Dash salt and pepper
1 tsp oil
2 cups fat free chicken broth
1/2 cup white wine (optional)
1/4 cup fresh lemon juice
4 cloves of garlic, minced
1/4 cup fresh parsley, minced
2 tbsp capers, rinsed
2 tsp cornstarch stirred into 1 tbsp cold water

Directions

Heat the butter in a large frying pan. Saute the mushrooms, stirring occasionally, for 5 minutes, or until the mushrooms are tender and slightly browned. Set them aside in a separate plate.

Stir together the flour, salt, pepper, and paprika, and place in a shallow plate. Cut the chicken breasts in half, then cut them through the middle to produce 4 thin cutlets. Press them into the flour until they're covered on all sides.

Heat the oil in the pan, then add the chicken and brown on all sides. Add the rest of the ingredients and stir. Bring to a boil, reduce heat, and simmer 15-20 minutes, until the chicken is cooked through and the sauce is thickened.

Serve over rice pilaf or with a side of vegetables.

Serves 4.

Read more...

Pizza-Stuffed Squash Boats

>> Monday, August 29, 2016


Pizza-Stuffed Squash Boats


A few days ago I received a giant zucchini squash from a friend - I mean, this was a monster, 15 inches long and about 4 inches wide. Immediately I thought of stuffing it with something, and rummaged through the pantry for inspiration. Some good Italian sausage rounded it out nicely, and we had a carb-free pizza dinner.

One year growing up in the country, our family tried the Great Zucchini Experiment. We decided to cultivate a half acre of squash to sell at the farmer's market. Farmer's markets in that place and time were not filled with trendy gourmet and organic premium vendors; these were farmers selling directly to the produce buyers for canneries, factories, and grocery stores.

Our family plan was to work together on the zucchini plot and split the profits based on the amount of work we each put in. Being the baby and somewhat babied, I am sure I put in the least amount of work, but every Saturday before dawn I'd load up baskets of the squash into the old pickup and we'd sit with the other farmers in our folding lawn chairs while the buyers browsed.

Week after week, no one bought from us. We couldn't understand it. My mom sent me out to scout the competition, and I reported back that we had the biggest squash at the market, way bigger than anyone else's. The squash we weren't selling went week after week into the freezer or onto the table until we all thought we'd die of zucchini poisoning.

Finally mom asked a farmer friend to come take a look at our stock and tell us what we were doing wrong. He picked up a ginormous zucchini. "These are way too big. Seeds get hard in there and they taste bitter; nobody wants to buy them like that." He told us the produce folks were looking for ones about 4 inches long and 2 wide, with evenly green, unblemished skin and a high gloss. They looked for a fresh stem end, too, so we were best off picking them the day of the market if we could.

So that's what makes for the best and freshest squash, and those are the ones I recommend looking for when you're shopping. We took his advice and picked with flashlights in the early morning to get the freshest ones to the market. And it was many years before I could make myself eat zucchini again, after the Williams Zucchini Collective folded.

Ingredients

1 pound Italian sausage
1 cup onion, chopped
1/2 cup green pepper, chopped
1 garlic clove, minced
1 14-oz. can pizza sauce, or 1 can tomato puree with 1 tsp oregano and 2 tsp basil
1/3 cup water
3 squash, 4-5 inches long
1 cup mozzarella cheese, shredded
1 cup cheddar cheese, shredded
1/4 cup parmesan cheese, grated

Directions

Take the sausage out of its casing and brown it in a medium skillet until it is crumbly and completely cooked. Set it aside in a bowl, and saute the onion, pepper, and garlic until tender. Add the sausage, sauce, and water, and simmer, covered, for 10 minutes.

Preheat the oven to 400 degrees. Slice the squashes in half lengthwise and cut off the stem end. Cut out the seeds from the center of each half. Place the squash face-down on a plate and microwave on high for 10 minutes, or until the squash is tender.

Spray a baking sheet with oil. Place the squash rind-side down and fill with the sausage mixture. Sprinkle with the cheeses, then put it the oven. Bake for about 20 minutes, or until the filling is cooked through and the cheese is melted and bubbly.

Serves 4-6.

Read more...

Red Lobster's Cheddar Bay Biscuits (lower fat version)

>> Wednesday, August 17, 2016

Red Lobster's Cheddar Bay Biscuits


Both of our girls worked at Red Lobster when they were in high school, but Joe and I never got tired of those buttery cheesy biscuits. They've been out of the Darden restaurant chain for years now; Joe and I had to come up with a new biscuit recipe that tasted the same but was lower in fat and calories than the original.

This works pretty well and satisfies my unending craving for breads soaked in garlic butter and cheese. Don't judge me - the first step of addiction is admitting I have a problem.


Ingredients

2 cups light Bisquick biscuit mix
2/3 cup skim milk
1/2 cup low-fat sharp cheddar, shredded
1/4 cup butter
1/2 garlic clove, minced, or 1/2 tsp garlic powder
1/4 teaspoon parsley

Instructions

Preheat the oven to 425 degrees. Stir the biscuit mix and cheese together in a mixer bowl, then slowly add the milk while mixing on low speed. When a sticky dough forms, scrape down the sides of the bowl, then mix on high speed for 30 seconds.

Spray a baking pan with oil. Drop 12 spoonfuls of dough onto the pan. Bake for 8-10 minutes, or until golden brown.

While the biscuits are baking, microwave the butter, garlic, and parsley until the butter is melted. Brush over the biscuits before removing them from the baking sheet. Serve warm.

Makes 12 biscuits.

Read more...

Healthy Chili's Southwestern Egg Rolls

>> Friday, May 20, 2016


Healthy Chili's Southwestern Egg Rolls

I tasted these rolls stuffed with chicken, cheese, corn, black beans, and other kinds of goodness last week at Chili's restaurant. The sauce itself I could have sipped with a straw, but since I was in polite company, I just casually wiped a bit of the last egg roll around and around the little dish. I think I drooled a little, too.

I was on a double mother/daughter date with Jessie, her boyfriend's mother Kim and his sister Kelly. We wandered around the mall, a place I haven't visited since my girls were teens. Kim wanted to get her ears pierced at Claire's Boutique. Did you know Claire's still exists? Actually, it's hard to imagine a mall without that teenybopper place. It hasn't changed - lots of glitter, BFF necklaces, and boy band posters. And of course, that piercing booth in the front window. I really, really wanted these avocado earrings.


After Kim got pierced, she treated us to appetizers at Chili's - another place I haven't visited in forever. It was nice to spend an afternoon doing nothing in particular except talking and hanging out. My life is clearly too busy, because I actually felt guilty for not doing something productive or goal-oriented with my time!

Anyway, these little Tex-Mex style egg rolls were a hit with everybody, and I definitely wanted to make them again. I looked for a recipe online when I got home. On some recipe copy-cat sites (Top Secret Recipes is pretty helpful) I found a recipe that weighs in at 870 calories. Eek! I decided to experiment with a lighter version of the recipe. I don't know exactly how many calories there are in my version, but they're not fried and they use low-fat ingredients. They taste just about the same, too.

Corn, bean, cheese and chicken wraps


By the way, the recipe calls for the vegetables to be finely chopped; I suggest putting them into the blender or food processor, if you have one, and let it do the work.

Ingredients


3 oz chicken breast
1 tsp chili powder
1 tbsp vegetable oil
1/4 cup red bell pepper, finely chopped
1/4 cup white onion, finely chopped
1 tbsp jalapeno, finely chopped
2 cloves garlic, minced
1 plum tomato, finely chopped
2/3 cup frozen corn
1/2 cup canned black beans, rinsed and drained
1 cup fresh spinach, finely chopped
2 tbsp cilantro
1 tsp cumin
1 tsp oregano
1/3 cup egg white
3/4 cup shredded low fat sharp cheddar cheese
8-10 seven inch flour tortillas

For the Avocado Ranch Sauce

1 ripe avocado
1/2 cup fat-free sour cream
1/2 cup low fat mayonnaise
1 tsp lemon juice
1/2 tsp salt
1 tsp onion powder
1 tsp garlic powder
2 tsp dried parsley
1/2 tsp ground pepper

Directions

Whisk together the oil and chili powder. Cut the chicken breast into fine pieces and allow to marinate in the oil mixture for 15 minutes. In a large skillet, cook the chicken pieces until browned on all sides. Set aside. 

Add a little more oil and saute the rest of the vegetables for 5 minutes. Stir in the egg, cheese and chicken and remove from heat. 

Oil a cookie sheet with spray oil. Wrap the tortillas in a damp towel and heat in the microwave for 1 1/2 to 2 minutes, until they are soft and flexible. Lay them one at a time on a cutting board and place about 2/3 cup of the filling down the middle of the tortilla. Fold over the end, then roll up the tortilla and place it, seam side down, on the cookie sheet. Repeat with the remaining tortillas and corn/bean mixture.

Place the freezer for 15 minutes to solidify the filling. While the rolls are chilling, heat the oven to 400 degrees. Blend together all the sauce ingredients until very smooth, and let it chill until you're ready to serve it.

Spray the tops of the rolls with oil. Place the sheet on the center rack and cook for about 20 minutes, turning once, until the rolls are nicely browned and the filling is cooked through. Slice the rolls halfway through on a diagonal, and serve with the avocado sauce.

Serves 6-8.

Read more...

Sausage with Peppers and Onions

>> Sunday, January 3, 2016


Cheap, easy, and hearty fall food...this one fits all the First Apartment Food requirements, Jessie and Jenn. And if you buy a low fat sausage like a turkey or chicken sausage, this tomato-y pasta topper is nearly fat-free, also. This dinner can be on the table 30 minutes after you enter the kitchen.

First, you cut up the string of sausage. Heat up a  frying pan and when it is hot, turn it to medium heat and stir in the sausage. Brown the sausage on all sides, stirring occasionally. While the sausage is cooking, slice the peppers and onions into strips. I like to use a couple of different colored peppers because they look pretty in the finished dish, but green bell peppers are usually the cheapest and they all taste pretty similar. When I made this one, I also added some cut-up zucchini that needed to be eaten. You can put in whatever vegetables sound good to you.


Heat some oil in another pan. When it is hot, put in all the peppers, onions, and garlic and cook on medium heat until they start to soften, stirring now and then. While this is cooking, put a paper towel on a plate and then spoon off the sausage onto it. This will drain off any grease from the sausage. You're done with the sausage pan now.

Next, put the sausage into the pan with the cooked veggies and stir it up. Open up a 20 oz. jar of spaghetti sauce and pour it over the sausage and peppers. After I've poured out a jar of sauce, I like to add about 1/2 cup of water to the empty jar, swish it around to get the rest of the sauce, and then pour it all into the pan. In my opinion, there is so much flavor in this dish that it is OK to use cheap spaghetti sauce. Heat the pan until the sauce is boiling, then turn it to medium-low and put a lid on it.


Fill a large pot 2/3 full of water. Add 1 teaspoon of vegetable oil to keep the pasta from sticking. Heat it until it is boiling well. Pour in the pasta and stir it right away so the pasta is coated with water on all sides so they don't all clump together. I happen to like linguine for this recipe, but any kind of larger pasta would work well. Really thin pastas like angel hair will be too delicate for the big chunks of sausage and vegetables.

If you can afford it, buy whole wheat pasta. It has more fiber which is good for your stomach and your digestion. It's also more nutritious.Cook the pasta for as long as the package says. I recommend only cooking it to the lower end of the time range because I like my pasta a bit firm. When the time is up, pour it into a colander and let it drain for 2-3 minutes. Stir it at least once so that the pasta doesn't clump together.

Put a serving of hot pasta onto a plate and ladle some of the sauce over it. Let's eat!

If you have left-overs, I suggest storing the pasta and sauce in separate containers so the pasta doesn't absorb all the juice and get soggy.

Ingredients

1/2 pound mild or hot Italian sausage
1 tbsp vegetable oil
1 large red, orange, yellow, or green bell pepper
1 medium onion
1 clove of garlic, or 1 teaspoon garlic powder
1 20-oz. jar of spaghetti sauce
1 box of pasta

Directions

Cut up the sausage into 1" wide pieces and brown it in a medium saucepan on medium heat. Slice the peppers and onions into 1/4" wide strips. In a separate frying pan, heat up the oil. Add the onions and peppers and saute for 10 minutes, stirring occasionally.

Add the minced garlic. Pour in the spaghetti sauce and bring to a boil. Reduce heat and simmer, stirring occasionally, for 10 minutes.

Cook the pasta according to the package directions. To serve, place a helping of pasta on a plate and top with the sauce.

Serves 4-6

Read more...

Buffalo Chicken Mini-Meatballs

>> Wednesday, October 21, 2015


Buffalo Chicken Mini-Meatballs


There's a restaurant chain in New York City called The Meatball Shop and they specialize in -- you guessed it -- meatballs. They grind their own meat and they can even name the farms that sourced each of their ingredients. And yes, they have all the fun they can have on this side of tasteful with the word "balls". 

One of their best-sellers is Buffalo Chicken Meatballs, which was a revelation to both of us. Just when we thought the Buffalo Wings phenomenon had gone as far as it could, here is something new. Bonus: it's a lot healthier than wings fried with their skin on. 

These nuggets make great party appetizers or a mid-week dinner, like the one Joe and I enjoyed last week after we found a great sale on ground chicken. 

Adjust the amount of hot sauce to your own temperament - and you can always add cayenne pepper if you need an extra kick. This version of the recipe is a compromise between Angela's wimpiness and Joe's immunity to spicy foods.

Ingredients

Hungry Lovers Hot Wing Sauce

1/3 cup butter 
3 cloves garlic – crushed 
1 tsp cornstarch in 1 tsp cold water
1 cup Louisiana hot pepper sauce 
1/2 tsp sugar 
2 tsp Worcestershire sauce 
½ tsp fresh ground black pepper 


Directions

Heat a medium sauce pan on medium low heat, and then add in the butter melting it until bubbling stops. Add the crushed garlic and sauté for about a minute. Whisk in the cornstarch mixed with cold water until it is smooth.

Pour the Louisiana hot sauce into the pan, and mix well. Stir in the remaining ingredients. Bring to a slight boil and then reduce the heat to a simmer for about 10 – 15 minutes to blend all the flavors and thicken the sauce.

If making hot wings or chicken tenders, drizzle enough sauce onto the meat to coat, then toss and serve. Otherwise let the sauce cool and store in a jar in the refrigerator. You can also can the sauce. Canning instructions can be found at Hungry Lovers Canning Basics.

For the meatballs

2/3 cup Hungry Lovers Hot Wing Sauce, divided
1 lb ground chicken
1 large egg
1/4 cup onion, minced
1/4 cup celery, minced
3/4 cup bread crumbs
1 teaspoon salt

Directions

Preheat the oven to 450°F. Spray a cookie sheet or baking dish with oil.

Stir together half of the hot sauce and all other ingredients until well mixed. With your hands, scoop up enough meat mixture to make a 1" meatball (about the size of a walnut). Roll into a firm ball. Place the meatballs on the baking pan in rows, keeping the meatballs close together.

Bake the meatballs for 20 minutes, or until they are browned and cooked through. Toss them with the remaining hot sauce before serving. We like these with a variety of fresh crisp vegetables and blue cheese or Green Goddess dressing for dipping.

Makes 30-40 1" meatballs.

Read more...

Spaetzle with Swiss Cheese

>> Monday, October 5, 2015


Spaetzle dumplings


After eating spaetzle my whole life, a favorite recipe of my grandmother's, I was startled to find that the culinary world is now into spaetzle. It's popping up on menus and in food magazines all over the place.

If you haven't heard of spaetzle before, they are little noodles or dumplings made of flour, milk, and egg pressed through a colander or spaeztle press. My sister brought me an authentic Kull metal press from Germany 30 years ago. We also use it for juicing lemons and limes.

Kull Spaetzle Press

People pronounce it either SHPET-zul or SHPET-zlah or SHPET-zlee (regional differences, maybe?). They can be fluffy or a little chewy, depending on the cook and the recipe. Spaetzle can be used in place of any starch like pasta, polenta, egg noodles, dumplings, mashed potatoes, or rice. I loved it when my mom or my grandma made a savory pork roast with plenty of gravy poured over all those little noodles.

But spaetzle with Swiss cheese is a long-time family favorite which is also a main dish that's cheap and quick to make. It's a German version of mac and cheese, really. Like all family recipes that are passed along for years, people in my family make it slightly differently. My mom makes a very simple version; my Aunt Monica browns butter very darkly before tossing with the noodles, and we like to add pepper and garlic and a bit of seasoned bread crumbs because, well, you know we love more flavor.

At the famous Mader's Restaurant in Milwaukee, and the Chicago Brauhaus, I've had spaetzle that was pan-fried as a side dish. I've tried pan-frying the noodles in butter after boiling them, and it works particularly well with the grated cheese. You might want to try it both ways and see what you like best.

This basic spaetzle recipe is just a start. Try adding chopped herbs or spices, or some mustard, or sour cream, for extra flavor, as it suggests in this Chicago Tribune article on spaetzle.

Ingredients

Basic spaeztle noodles

4 eggs (my mom estimates 1 egg per person)
1/2 cup of milk, plus extra for consistency
3 cups of flour
1 tsp salt
1 tsp pepper (optional)
1 tsp garlic powder (optional)

For the topping

4 cups grated Swiss cheese (measure after grating)
4 tbsp butter
1 cup Italian seasoned breadcrumbs (optional)

Directions

Whisk together the eggs and milk. In a separate bowl, stir together the rest of the ingredients. Slowly add the egg mixture to the flour mixture, stirring constantly. The batter or dough should be similar to a very thick, slightly sticky bread dough, depending on how tender or chewy you like the dumplings. After you make it a few times, you'll figure out the consistency you want. Add more milk or water if you want to adjust the texture.

Spaetzel dough


If you want light, fluffy noodles, stop stirring as soon as the ingredients are combined; for firmer noodles, stir for five minutes before cooking.

Heat a pot of water to boiling. Place a large scoop of the dough in the colander or spaetzle maker and press the dough through the holes. They should fall through in a solid stream; you may have to cut off the noodles to free them from the holes. Stir the noodles immediately to keep them from sticking together.

Kull Spetzle Press

Boil for 5 minutes, then drain well. Repeat with the rest of the dough, while keeping the finished noodles warm.

If you want to pan-fry the noodles after they are cooked, heat up the butter in a frying pan until the foaming stops. Dump in the noodles and stir them around so they're coated with butter. Cook until golden brown on one side, then flip over and brown the other side.

Otherwise, melt the butter and stir into the noodles. Toss the noodles with the Swiss cheese, then sprinkle with the breadcrumbs before serving.

My mom always serves Spaeztle With Swiss along with homegrown peaches she canned herself, and I can't improve on that combo.

Serves 4-6 as a main dish, 8 as a side dish. 


Read more...

Jalapeno Popper Stuffed Chicken

>> Wednesday, August 19, 2015


Jessie, you're going to love this chicken - it is fast, easy, and just a little spicy. It's pretty healthy, too, if you use low fat cheese and bake the chicken rather than fry it.

Ingredients

2 large chicken breasts
2 small jalapenos, seeded and diced
1/3 of a small red bell pepper, cut into thin strips
2 oz. low fat cream cheese
1 tbsp milk
1/2 cup low fat cheddar or pepper jack cheese
1 tsp garlic powder
Salt and pepper to taste
2 slices of bacon

Directions

Place each chicken breast on a cutting board and put your (non-cutting) hand on top of it. Cut through the edge nearly through to the other edge, then open it wide like butterfly wings (this is called "butterflying" the meat). Using a mallet, pound out the butterflied meat until it is thinner. Sprinkle with the garlic powder, salt, and pepper.

Preheat the oven to 350 degrees and oil a cooking pan.

Closing stuffed chicken breast

Stir together the cream cheese, milk, cheddar, and jalapenos. Spread half of the mixture onto one side of each chicken breast. Place half of the pepper strips on each breast. Fold it in half and pound the edges together with a mallet so that it holds together better.


Putting toothpicks in stuffed chicken breast


Stick a few toothpicks through the edges of the meat so it stays together while cooking, and the filling doesn't leak out. Wrap a slice of bacon around each breast. Heat a frying pan to medium heat, and brown the chicken for 2-3 minutes on each side.


Place in the oiled pan and pour 2 tbsp of water over the chicken. Bake for 30 minutes, or until the chicken is firm and no longer pink. We ate this with mashed potatoes and steamed zucchini, and it was great!

Serves 4.

Read more...

Aunt Monica's Chicken Divan

>> Tuesday, June 23, 2015


My Aunt Monica is the first person I remember showing real joy when she was cooking. There are plenty of fine everyday cooks in my family, but my flamboyant Aunt Monica was the one humming while she cooked, and giggling and making us taste little pieces of everything before she put it into the recipe.

Chicken Divan is one of those quintessential 70s casseroles that might not be trendy right now but is still really awesome. It's forever tied to Aunt Monica in my mind because she used to make it in Grandma's kitchen if there was a crowd at the holidays.

My parents, the dog, and my sister would drive from the farm in Michigan to the big city of Waukegan in Illinois. When our station wagon ran up  I-94 highway past the big Magikist lips sign, we knew we were almost to Grandma's place.

old neon sign in Chicago, Magikist


Come to think of it, I have no idea what Magikist was trying to sell us when all the red lights flickered on.

It also just occurred to me that I can't imagine my grandma sharing her kitchen with anyone. Aunt Monica was a powerful force of nature, just like my grandma, and surely there were lightning strikes at some point.

Yet every holiday all the cousins would be shooed down to the rumpus room (yes, that's what it was, and I can describe the rumpus), and all the adults would settle in at the kitchen table with cigarettes and big 70s pipes and cocktails and catch up. Back then, my mom smoked only when she was around her mother, who made her nervous. It must have been a smoky kitchen!


Aunt Monica would announce when the casserole was ready and she would bring it out with a flourish and some sort of comment that has always made me imagine this was an exotic and fancy dish for special occasions. As it surely can be.

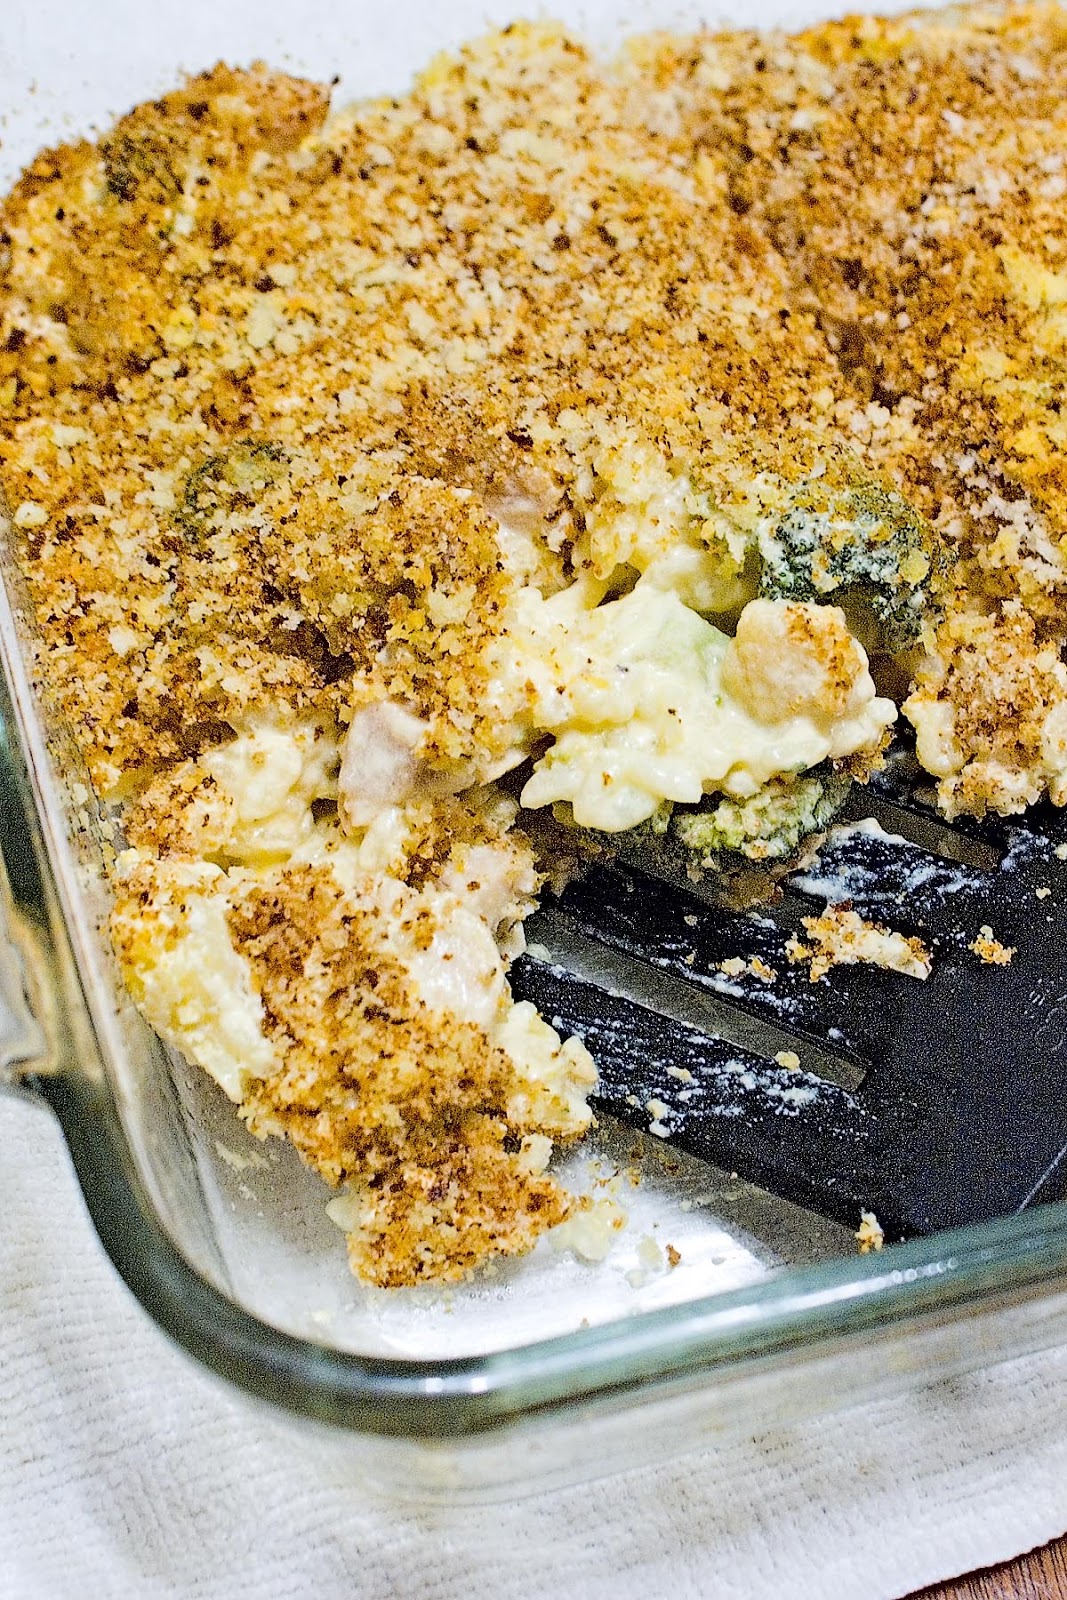
I'm pretty sure boneless skinless chicken breasts and cream of whatever soup were not in my Aunt's original recipe, but I've posted an easy version and a bit of an upscale version, depending on how you feel about cooking on a particular day.

I think it's also worth noting that this is one of a handful of recipes I've ever tried in which I actually don't mind broccoli, because I really don't like it.


Quick Chicken Divan

2 cups canned chicken, drained, or cubed chicken breast cooked until no longer pink
2 1/2 cups fresh or frozen broccoli florets 
1 can cream of chicken soup and 1/2 cup milk
1 cup shredded cheddar cheese
1 1/2 cups cooked rice (try Minute Rice if you're in a hurry)
1 tsp dry mustard
1 slice of bread

Instructions

Heat the oven to 400 degrees. Grease a 9x12 casserole dish.  Stir together all ingredients except bread, and pour into the casserole dish. Chop the bread into fine crumbs and sprinkle on top, then spray the crumbs with oil. Bake for 20 minutes, or until cooked through and bubbly.

Serves 4.

Gourmet Chicken Divan

For the Sauce

3 tbsp butter
2 tbsp flour
2 1/2 cups milk
1/3 cup sherry
1/2 tsp nutmeg
2 tsp dry mustard
1 tsp curry powder
Salt and pepper to taste

For the Casserole

4 chicken thighs, skin removed
2 1/2 cups fresh or frozen broccoli florets
1 cup cooked rice
1 cup shredded cheddar
1 1/2 cups bread crumbs
2 tbsp butter

Instructions

Preheat oven to 350 degrees. Grease a 9x12 baking dish.

Melt the butter in a medium saucepan, then stir in the flour. Cook and stir until the flour is browned, then pour in the milk. Whisk the sauce until smooth, then bring to a simmer. Cook 10 minutes, or until the sauce is thickened. Stir in the sherry, nutmeg, mustard, curry, salt and pepper. Cover and simmer gently for 5 minutes longer. Set aside.

In a large frying pan, brown the chicken pieces on all sides. Stir together broccoli, rice, and cheese, then spread into the casserole dish. Arrange the chicken over the top. Pour the milk sauce over the chicken. 

Sprinkle the breadcrumbs over the casserole. Drizzle with the melted butter, then pop in the oven. Cook 25 minutes, or the chicken juices run clear when you pierce the pieces with a fork. 

Serves 4-6.

Extra note: if you're only feeding a few people and nobody likes leftovers, split the casserole in two and freeze one half in a small baking pan for another dinner when you're too busy to cook.

Read more...

Grilled Pineapple with Basil-Tarragon Cream

>> Tuesday, June 16, 2015


Grilled Pineapple with Basil-Tarragon Cream


When you grill pineapple slices, their juices sizzle into caramel and they're richer, smokier. Pair it up with this bright and creamy sauce, and you have breakfast, a side dish, dessert, or all three, if you make enough. This also makes a tasty dip for a spread of fresh-cut fruits.

Basil-Tarragon Cream


By the way, I think people should use tarragon more often. I'm on a quest to bring it back into common use. It has a slight flowery licorice flavor, but if you don't like licorice, I'll emphasize that it's a slight hint of licorice or anise. Tarragon is popular in traditional French cooking. We used to grow a tarragon bush at our house, but now that we're apartment-dwellers there just isn't room. The dried leaves are fine, though a bit milder and mellower. Try using in in salad dressings or with poultry and fish, too.

Ingredients

1 cup plain fat free yogurt
1 tsp fresh tarragon, snipped
3 tsp fresh basil leaves, snipped
1 tsp lemon zest
1 tsp honey
1 large pineapple

Directions

About 1 hour before serving, stir together the yogurt, tarragon, basil, lemon zest, and honey. Allow to sit at room temperature until ready to serve.

Cut off the top and bottom of the pineapple, then cut off all the outside skin. Cut out any of the "eyes" of pith in the fruit. Cut out each section of fruit from top to bottom around the core (think of making a hexagonal stop-sign shape). Cut each section into 1-inch thick slices.


Heat the grill to medium-hot. Lay the slices on the grill, or place them on a grill pan and set it on the grill. Cook for 4-6 minutes on each side, or until the surface is turning golden brown and the fruit is heated through. Serve with a scoop of cream sauce on top.

If you have any leftovers, store the fruit and cream separately, so that the sauce doesn't get runny.

Makes 1 cup of sauce and about 30 slices of pineapple.

Read more...

Loaded Smashed Potato Casserole

>> Monday, June 8, 2015


Loaded Smashed Potato Casserole


If you're asked to bring a dish to the potluck or an Independence Day cookout, you couldn't do any better than these unbelievably decadent smashed potatoes. They've got everything you'd love on a baked potato. If I'm missing anything you like, just throw it in there. This is especially good if you top it with the french fried onions before cooking, but this is optional if you want to save your heart.

If you're feeling guilty afterward, take a long walk, watch the fireworks, and then come home and eat the leftovers. Repeat as often as necessary.

Ingredients

2 1/2 lbs russet or red-skinned potatoes
1/2 cup butter, melted
1 cup light sour cream
2 tbsp parsley, chopped
2 tsp garlic powder
Salt and pepper to taste
2 stalks green onions, chopped
6 strips of bacon, cooked, chopped, and divided in half
1 cup low-fat shredded cheddar cheese, divided in half
2/3 cup french-fried onions (optional)

Directions

Scrub the potatoes and prick them with a fork. Boil or microwave the potatoes until tender. Drain (if boiled), then put in a large bowl. Add the butter and sour cream and mash until smooth. If you like, you can also mix them in a food processor or with a mixer.

Loaded Smashed Potato


Preheat oven to 350 degrees. Oil a 9x12 casserole dish.

Stir the garlic, parsley, salt and pepper, and green onions into the potato mixture. Then add half of the bacon and cheese. Mix well. Spoon it into the casserole pan. 

Bake for 20 minutes, then pull it out and top with the remaining bacon, cheese, and french-fried onions. Bake for 10 more minutes, or until it is cooked through and the cheese is melted.

Serves 8-10.

Read more...

Garlic and Fennel-seed Studded Pork Roast

>> Wednesday, April 29, 2015


Garlic and Fennel-seed Studded Pork Roast


Jenn and Jessie, one of these days you'll probably want to make a pork roast for a special dinner or a holiday. In fact, you could invite your parents over for Mother's Day (second Sunday in May) and serve them this wonderful roast with gravy, and of course, plenty of mashed potatoes.

Fennel seed is the fragrant seasoning in many sausages. It seems to naturally pair up with pork. Adding ground ginger and mustard gives the meat a bit of tang.


Ingredients

1 3-4 pound pork roast
2 garlic cloves, slivered
2 tsp fennel seed
1 tsp ground ginger
2 tsp dry mustard
2 tsp ground black pepper
2 1/2 cups beef broth, divided
1 tbsp corn starch
2 tbsp cold water

Directions

Preheat the oven to 300 degrees.

With a sharp knife, deeply pierce the fat layer in one or two inch rows all over the pork roast. Insert a sliver of garlic and one or two fennel seeds into each piercing. Stir together the mustard and ginger and sprinkle it all over the meat.


Pork roast stuffed with garlic and fennel seeds

In an oven proof pan, brown the meat on all sides. Pour one cup of hot beef broth over the roast, cover, and put it in the oven. Roast it for 30 minutes per pound, basting occasionally. Add more liquid if it boils away. The roast is done when it is no longer pink deep in the middle, or when a meat thermometer inserted in the center of the meat reads 160-170 degrees. You do have a meat thermometer, don't you? If you do, make sure you don't roast the plastic meat thermometer sleeve, like I did the first time I used one.

Pork roast braising in Dutch oven


Remove the meat from the pan, place it on a cutting board, and cover with foil. Put the roasting pan on the stove and turn on medium heat. Pour the rest of the beef broth into the pan and bring it to a boil, scraping off the rich crusty bits from the bottom of the pan. Stir together the corn starch and water, then slowly pour it into the sauce while stirring constantly. Allow it to simmer until thickened into gravy.

Carve the roast and pour any juices from the cutting board back into the gravy. Serve with the gravy on the side.

Serves 6-8, depending on the size of the roast.

Read more...

One Pan Chicken Alfredo

>> Monday, March 9, 2015


One Pan Chicken Alfredo

When our second daughter was younger, pasta alfredo was one of her favorite dishes - that and chicken fingers. Her first visit to Rome was when she was thirteen, and she asked the waiter for spaghetti with alfredo sauce. The waiter had never heard of it.


In rough Italian, Joe described to the waiter the kind of sauce Jenn would like on her pasta. What came out of the kitchen wasn't exactly what we'd call an alfredo sauce, but it satisfied Jenn.


Jessie and Jenn at the Coliseum, Rome 2004

This one-pot recipe satisfies her, too. A 30-minute dinner, with only one pan to wash - we all love it! Add other items if you like: sliced mushrooms, fresh peas, sun-dried tomatoes, or whatever else sounds good to you. This is also a great meal to use up leftover chicken or turkey, which makes the recipe even quicker because you don't have to brown the meat first.

Ingredients

2 tbsp of olive oil
1 1/2 lbs boneless, skinless chicken breasts, cubed
Salt and Pepper to taste
2 cloves of garlic, minced
2 cups chicken broth
1 1/2 cup of milk
1/3 cup cream cheese, softened
1 lb penne or other thick pasta, uncooked
1 1/2 cups Parmesan or Romano cheese, grated
Salt and pepper

Directions

Heat the oil in a large saucepan, then add the chicken and lightly brown it on all sides. Add the garlic and saute until tender. Add chicken broth, milk, cream cheese, and uncooked pasta to pan and stir. Bring to a boil, reduce heat, and simmer, stirring occasionally. 

The pasta will be tender in 10-18 minutes, depending on the thickness of the pasta. Remove from heat and stir in the Parmesan cheese before serving.

Serves 6.

Read more...

Turkey Cordon Bleu Casserole

>> Wednesday, June 25, 2014


Turkey Cordon Bleu Casserole


This casserole recipe from my sister-in-law Carolyn is so quick and easy that it's perfect for using up leftover turkey and for feeding holiday houseguests. Why spend all your time in the kitchen, when there's so much fun to be had? It's so delicious that people will forget they're eating leftovers.

This is also perfect for feeding a crowd any time of year. In Iowa, where Carolyn lives, this is a staple on buffets and church hot-dish suppers. The recipe can easily be scaled up for large groups. Substitute chicken if you don't have any turkey.

Ingredients

2 cups plain croutons
2 cups turkey, cubed
2 cups ham, cubed
2 c. grated Swiss cheese
1 can cream of chicken soup (we like the low-fat, low-sodium kind)
1 c. water
1 cup finely crushed bread crumbs
salt and pepper to taste

Directions

Butter a 2 quart casserole dish. Spread the croutons on the bottom. Add half of the turkey and ham cubes. Sprinkle half of the cheese over the meat. Then pour half of the chicken soup/water mixture over. Repeat meat, cheese, soup mixture.

Sprinkle bread crumbs on top and season with salt and pepper. Bake, covered at 350 degrees for 40 minutes.

Read more...

Creamy Beef Pot Pie

>> Wednesday, May 7, 2014


Creamy Beef Pot Pie

This creamy-savory pot pie is a dressed-up version of one of my Mom's economical comfort foods. When I was a kid, there were never any leftovers when she made this for dinner. Recently I was craving that old-time meal, so we turned out the vegetable bin and whipped up this fabulous casserole.

There were leftovers, but I had them for lunch the next day.

Ingredients

1 pound very lean ground beef (you can use lean ground turkey if you prefer)
1 cup white onion, chopped
1 cup carrot, peeled and chopped
2 stalks celery, chopped
1 red pepper, seeded and chopped
1 1/2 cups fresh mushrooms, sliced
2 cloves garlic, minced
1 tsp thyme
1 1/3 cups fat-free milk
salt and pepper to taste
1/2 tsp cayenne pepper
1/8 tsp nutmeg
1/3 cup flour
1/2 cup fat-free sour cream
1 tube Pillsbury Crescent Rounds

Directions

Crumble the meat into a frying pan and cook until completely browned. Drain off the fat and set the meat aside. In the same pan, saute all the vegetables and thyme until tender. Add the meat back to the pan and keep warm.

In a small saucepan, heat the milk until bubbles form at the edge. Slowly whisk in the flour, cayenne, nutmeg, salt and pepper. Bring to a boil, reduce heat, and simmer until thickened to the consistency of gravy, about 10-15 minutes. If it gets too thick, add a bit more milk. Off heat, stir in the sour cream. Stir the sauce into the meat mixture, and pour it into a 9x12 casserole pan.

Preheat the oven to 375 degrees.

Open the crescent rounds and unroll them onto a cutting board. They should pull apart into long strips; cut 1/3 of these strips in half. Starting in one corner of the casserole pan, lay one long strip along the long side and a short strip along the short side. Begin alternating the long and short strips, laying them over and under to form a basket weave (a helper is very useful during the weaving!).
Bake at 375 for about 20 minutes, until the top is golden brown and the filling is hot and bubbly.

Serves 4-6.


Read more...

Crock Pot Pasta Fagioli

>> Thursday, March 6, 2014


Crock Pot Pasta Fagioli

It's been a long hard winter, and with my rheumatoid arthritis and the extreme cold, I come home from work with all my old joints aching. Being a writer, people thought a job as a librarian would be perfect for me. I have to admit, though, that the hours of standing and all the heavy lifting and those stubborn slippery books that don't want to stand up in a straight row sometimes makes me sick of books!

Like everyone else, though, it all looks better once spring peeks its pretty head around the corner and we all come running to the warmth. In the meantime, we're planning meals earlier in the day but sometimes don't dine until 10 pm or so (Joe likes to wait for me to get home so we can eat together). Isn't it wonderful to come home from work and a nice hot dinner is ready to eat? This recipe is just about as simple as opening cans and dumping them in the crock pot.

To make it even quicker, you can buy frozen chopped onions, carrots, and celery. In the version shown in this photo, we added a can of mixed vegetables from the back of the cupboard, so there's peas and limas and corn in the stew this time.

Slow Cooker Pasta Fagioli soup


If you want a very thick stew, as we made, add the pasta with everything else. If you prefer a brothy soup, boil the pasta separately and add to the soup before serving. If you have leftovers, they will freeze better if the pasta and soup are kept separately.

We make this as a way to clear some cans out of the pantry for a meatless Monday, and to make a low-fat and hearty meal. If you want some meat in yours, add a pound of ground beef or turkey, browned and drained, to the pot.

Ingredients

1 onion, chopped
3 carrots, peeled and chopped
4 stalks celery, chopped
1 28-oz can Rotel or Italian-style crushed tomatoes
1 16 oz can tomato sauce
1 16 oz can red kidney beans, drained
1 16 oz can cannellini or Great Northern white beans, drained
1 28 oz can vegetable stock
2 tbsp garlic powder
3 tsp oregano
1 tbsp dried basil
1 tbsp salt
2 tsp pepper
1 tbsp hot pepper sauce
8 oz pasta (we used whole-wheat ditalini in this batch)

Instructions

Add all ingredients to crock pot and stir well. Cover and cook on low 7-8 hours, or high 4-5 hours. If you add pasta near the end, either turn the slow cooker to high and add it 30 minutes before eating, or boil the pasta according to package directions and add before serving.

Serves 6.

Read more...

One-Pan Mac & Cheese with Spinach & Bacon

>> Sunday, February 16, 2014


One-Pan Mac & Cheese with Spinach & Bacon


Everybody's got a box of macaroni and cheese somewhere in the cabinets, right? It's one of my guilty pleasures. Adding spinach, bacon, and a bit more cheese makes this quick dinner more substantial. I made it up the other night while catching up with my daughter Jessie on the phone, and she wanted the recipe right away. I think this qualifies as gourmet First Apartment Food.

So what's up in First Born's and The Boy's life? Along with trudging to work and university in below-zero Polar Vortex weather, they're dog-sitting their aunt's mini dachshund - and enjoying it! This is a little weird for me; like every other mom of twenty-somethings, my memories of her as a teenager blur oddly at times with the adult she is now. And what I remember is being frustrated with cats that needed food and water when she wanted to be left alone and affectionate when she...well...wanted to be left alone. There was a lot of that once.

It's been a whole month since I spent time with her, and I miss her a lot. Last month we got together for a cooking date and made peanut chicken noodles and pork dim sum and hung out all day. Of all the stages of having a daughter, this is most certainly the best stage yet.

Ingredients

1 box macaroni and cheese
4 slices of bacon
2 cups packed baby spinach leaves
3 tbsp butter or margarine
1/2 cup milk
1/8 tsp. ground cayenne pepper
1 tsp onion powder
1/2 cup shredded colby cheese

Instructions

In a large saucepan, bring 6 cups of water to a boil and add the noodles. Set aside the cheese packet. Boil for 7-8 minutes, until tender. While it's boiling, cut the bacon into 1/2" pieces, and chop the spinach. When the noodles are tender, drain them in a colander.

While the noodles drain, cook the bacon in the saucepan over medium heat. When it is starting to get crispy, drain out the fat and add the spinach and butter. Cook the spinach 1-2 minutes, until it is slightly wilted. Add the milk, cayenne pepper, and onion powder. Stir in the noodles and cheese. When the cheese is melted, serve.

Serves 2-3.

Read more...

White Bean Chicken Chili

>> Sunday, January 5, 2014


White Bean Chicken Chili


Oh my, it's cold here in Illinois. It's two little degrees in Chicago, and they're saying that tomorrow will be about -10 F. I know there are much colder places in the world, but this shivers my timbers.

Time for a hot bowl of thick and spicy white bean chili. Chili in general is just about as flexible as a martini - you can add pretty much anything and still call it what it is. So if you don't have any white beans, throw in kidney beans or cannelinis or pintos - whatever you like. We like an extra bite of spice, so scale it back if spicy is hard on you.

This chili is great for using leftover cooked chicken or turkey, browned ground chicken, or even canned chicken if you're in a hurry. If you're not in a hurry, throw it all in a crockpot and go snowshoeing or ice fishing or some other winter-loving sport. Or you know, just cluster around the heating vents until it gets warmer.


Ingredients

2 tbsp oil
1/2 tsp red pepper flakes
1 ancho pepper, seeded and chopped
3 cloves garlic
2/3 cup diced onion
1/2 cup bell pepper, chopped
1 14-oz can white beans, drained
1 cup frozen corn kernels
4 cups chicken stock
1 pound chicken or turkey
1 tablespoon ground cumin
1 tablespoon dried oregano
Salt and pepper to taste

Toppings

1/2 cup cilantro leaves, chopped (optional)
2/3 cup shredded colby-jack cheese (optional)


Instructions

If you're using raw meat, cut it into bite-size pieces and saute with 1 tbsp of oil in a large saucepan. Set aside. Heat the 2 tbsp of oil and add the red pepper flakes and ancho pepper. Cook on low heat until the ancho is flexible. Add the onion, garlic, and bell pepper and cook until translucent.

Stir in the remaining ingredients except toppings and bring to a boil. Reduce heat to a low simmer, cover, and cook for 1 hour. Taste and correct the seasonings. Serve topped with the cilantro and cheese if you like. We ate this with a big loaf of cheesy pull-apart garlic bread. I'm embarrassed to say that we ate the entire loaf, but it is so very delicious, and we're fighting heavy weather here, folks.

Cheesy pull-apart garlic bread


If I had any sweet green chilies, cornbread with chilies would have been my preference. Chili and corn bread are like peanut butter and jelly, right?

Cornbread with sweet green chillies


The White Bean Chicken Chili serves 4-6.

Read more...

Quick Ham & Peas Pasta Salad

>> Wednesday, August 28, 2013


Quick Ham & Peas Pasta Salad


This cool and satisfying pasta salad can be ready in 15 minutes or less. It's perfect for a night when you are out of time for dinner and it's too hot to spend much time in the kitchen, anyway. If you like sweet relish better than dill, switch it up, and add extra dill if you'd like a bit more fresh herb taste.

This salad comes together even quicker if you buy pre-shredded cheese and cubed ham.

Ingredients

1 box pasta shells (or other medium pasta)
1 1/2 cups frozen peas
10 oz ham, cubed
8 oz pepper jack cheese, shredded
1/2 cup red onion, chopped
1 cup celery, chopped
1 cup bell pepper, chopped
1/2 cup dill pickle relish
2 cups Cheddar Bacon Ranch dressing (more or less, to taste)

Directions

Cook the pasta according to the package directions. Add the peas to the boiling water 3 minutes before the pasta is done. Drain the peas and pasta and rinse with cold water. Keep in the freezer while you chop up the other ingredients.

Stir together the chopped vegetables, ham, and cheese. In a large bowl, thoroughly combine the pasta, vegetable mixture, and salad dressing. Serve immediately, or chill until ready to serve.

Makes 6 main-dish salads.

Read more...

Gourmet Stuffed Hamburgers

>> Friday, July 26, 2013


Gourmet Stuffed Hamburgers


Try this fun recipe the next time you have people over for a burger cookout. Give each guest two hamburger rounds and an array of stuffings like bleu cheese, chopped olives, jalapenos, shredded cheddar, onions...whatever your imagination suggests!  After stuffing the patty, place the second round on top and pinch the edges together.

stuffed hamburger patties
Clockwise from top right: Cheddar and bacon, Swiss with onions and mushrooms, Olive with feta and roasted red pepper, and Swiss with green olives and pancetta.

The griller is in charge of remembering which burger belongs to which guest; it helps if a little of the stuffing drips out the side. Why not try these on homemade pretzel buns? It takes the burger to new heights of deliciousness.

Ingredients

For each burger

1/4 pound ground beef or turkey
1/4 tsp salt, pepper, and powdered onion
2 tbsp shredded cheese
2 tbsp sliced olives
1 tbsp sauteed mushrooms
1 tbsp sauteed or fresh chopped onions
1 tbsp roasted red pepper strips
1 tbsp cooked bacon, ham, or pancetta, diced
2 tbsp chopped spinach, kale, or basil
2 tsp chopped jalapenos
1 tbsp pizza sauce
2 tbsp chopped pepperoni or sausage

Note: each hamburger will only be able to hold about 3 types of stuffing before it explodes!

Directions

Form each 1/4 pound of ground beef into two patties with a lip around the edge. Sprinkle the stuffings on one half, then put the top patty over it and press down. Pinch the edges together well. Grill over medium heat until the desired level of doneness.

Read more...

Baked Chicken Parmesan Strips

>> Monday, June 17, 2013


Baked Chicken Parmesan Strips


Joe started making these quick and crispy chicken strips when Jenn was a teenager and her favorite food was chicken fingers. We were trying to get her to eat more healthfully rather than spending her paychecks at fast-food restaurants. These were a big hit, and we still make them even though our girls are on their own, and presumably making very healthy food choices at every meal.

By the way, if you want to annoy your teenager - and who doesn't, sooner or later - you can wait until they order chicken fingers and then whisper, "Chickens don't have fingers. What are you really eating?"

Ingredients

1 pound boneless, skinless chicken breasts
1/3 cup skim milk
1/3 cup nonfat dry bread crumbs or cereal crumbs
3 tablespoons grated Parmesan cheese
1/2 tsp oregano
1 tsp parsley
1/2 tsp paprika
Salt and pepper to taste


Directions

Cut chicken breasts into thin strips and place on a plate or shallow bowl. Pour the milk over the chicken and refrigerate for 15 minutes, while the meat absorbs the milk.


Preheat the oven to 375 degrees. Spray a baking pan with cooking spray.

Stir together the rest of the ingredients and spread the mixture on a plate. Roll the strips in the crumbs and place them on a pan, not touching each other. Spray the tops of the strips with more cooking spray.

Bake for 20 minutes, or until the crumbs are crispy and the chicken is no longer pink in the middle.

Serves 4.

Read more...

Chicken Asparagus Swiss Casserole

>> Friday, April 19, 2013


Chicken Asparagus Swiss Casserole


This is an elegant and flavorful casserole quick enough for a weeknight dinner, but special enough for company. If you don't like the taste of wine in your food, substitute chicken broth.

Asparagus is already looking delicious around here this year, so when they finally start sprouting up north, I bet it will be a good crop. If you find tough stalks in your asparagus, the ones that never get tender no matter how long you cook them, peel off the outer skin with a paring knife. You'll save more of the vegetable that way than just throwing out the bottom of the stems.

Ingredients

2 large boneless skinless chicken breasts
2 cups asparagus spears, cut into 2" pieces
1/2 tsp tarragon, crumbled
1 tsp dry ground mustard
2/3 cup shredded Swiss cheese
1/2 cup dry white wine
2/3 cup white bread crumbs or Panko crumbs
2 tbsp parmesan or romano cheese

Directions

Preheat the oven to 375 degrees.

Lay the chicken breasts on a cutting board and put your (non-cutting) hand on top. With a sharp knife, cut through each chicken breast lengthwise to produce two thinner breasts. This will make the chicken cook more quickly while staying tender during the cooking time.

Oil an 8x8 casserole dish with cooking spray. Place two breasts in the casserole, then sprinkle with half the asparagus, tarragon, mustard, and cheese. Pour half the wine over the chicken. Layer the rest of the chicken and other ingredients on top, then pour on the rest of the wine. Stir together the bread crumbs and parmesan, then sprinkle on top of the casserole.

Bake for 30 minutes, or until the chicken is cooked through and the asparagus is tender.

Serves 4.

Read more...

Pan-Roasted Chicken Breasts

>> Friday, March 15, 2013


Pan-Roasted Chicken Breasts

Jessie, pan-roasting meat is one of those traditional chef techniques that's really worth learning. You need a frying pan that can go in the oven, which means the handle should either be metal or another material that's ovenproof. If your frying pan handle already has burn marks or melted spots from using it on the stove, it's not ovenproof.

You can cook any thick cut of meat or fish this way; it makes the outside crisp and the inside incredibly juicy. Basically, you quickly sear the outside of the meat on high heat, then roast it in the oven so that it's evenly cooked. At the end, you sort of bathe it over and over with butter and broth while turning it and cooking, until the juice just seeps off of it. The extra steps are worth it - I was nearly in tears over a recent chicken breast. Yes, I know I get emotional about food, but still.

Ingredients


For the seasoning

2 tsp paprika
1/2 tsp thyme
1/2 tsp sage
1 tsp garlic powder
1/2 tsp celery seed
1/2 tsp salt
1 tsp black pepper


2 bone-in chicken breasts
4 tbsp butter
2 tbsp olive oil

Directions

Start by taking the skin off the chicken because you know you hate skin and even if you liked it, it's full of fat and not good for you. The fat end of each chicken breast is where the skin is loosest, so lift it up and pull it down toward the pointed end. You'll have to cut it off here and around the sides.

By the way, if you were ever in a plane crash like in the book "Hatchet" and had to live off of animals you caught, this is how you would skin them. Just in case you needed some survival skills. It comes off pretty easily once you get going. 

Next, you're going to stir together the seasoning ingredients and rub it into the chicken. The chicken on the left has been coated with the seasonings mixed together up above, and Joe's about to roll the other one on the plate of seasoning mix. Let the seasoned chicken sit for at least 15 minutes so the flavor seeps down into the meat. 

Seasoned chicken breasts


Preheat the oven to 450 degrees. Put the frying pan on medium-high heat, and when it is hot, pour in the oil and swirl it around to coat the pan. Adding the oil to a hot pan means you use less oil because it doesn't seep into the pores of a cold pan. It tastes better and heats up more evenly, too.

When the oil starts to shimmer in the pan, it's hot enough for you to put the chicken in the pan and brown it on one side for 3-4 minutes. Turn it over and brown the other side. When all sides are evenly golden brown (about 10 minutes), put the pan in the oven.

Roast the meat for 10-14 minutes, turning every few minutes, until the chicken is cooked to whiteness if you cut through the middle of a breast. If you use a meat thermometer, it should be about 165 degrees in the middle of the meat when it's done. Take the chicken out of the pan.

Place the pan on the stove. Melt the butter and oil together in the frying pan on medium-high heat until the butter has stopped bubbling but is still foamy. Put the chicken into the butter and let it sizzle for about 1 minute. Then tilt the pan so the butter mixture pools on one side, and pour spoonfuls of butter sauce over the meat. Keep basting the meat until the butter is a golden brown color like it is in the photo below. Serve it hot with the butter sauce on the side.


Serves 2-4, depending on how big the chicken is and how hungry you are.

Read more...
Related Posts Plugin for WordPress, Blogger...

  © Blogger template Simple n' Sweet by Ourblogtemplates.com 2009

Back to TOP